Rebuilding an iBook G3 clamshell battery
The iBook G3 clamshell is, without a doubt, one of the most beautiful computers ever made. The translucent plastic, the bright candy colors, the handle that's built into it. The keyboard is clicky and responsive, it has WiFi, it can run Mac OS X 10.4 Tiger as well as Mac OS 9, and it gets pretty dang good battery life -- if you have a good battery.
In the interest of seeing more of these beautiful laptops in use, I put together a guide to necromancing iBook batteries, the right way. Follow along and let's get you computing in style!
Feeling lazy? I sell these
This is sort of hard to do. You need about $165 worth of tools and parts, 1-3 hours of time to build it, and 15+ hours to train it.
💣 There can be sparks, red hot glowing metal, fires, and cute little explosions if you do it wrong. Folks that are generally pretty good at what they do have attempted this and they still struggled. But they didn't have this guide ;)
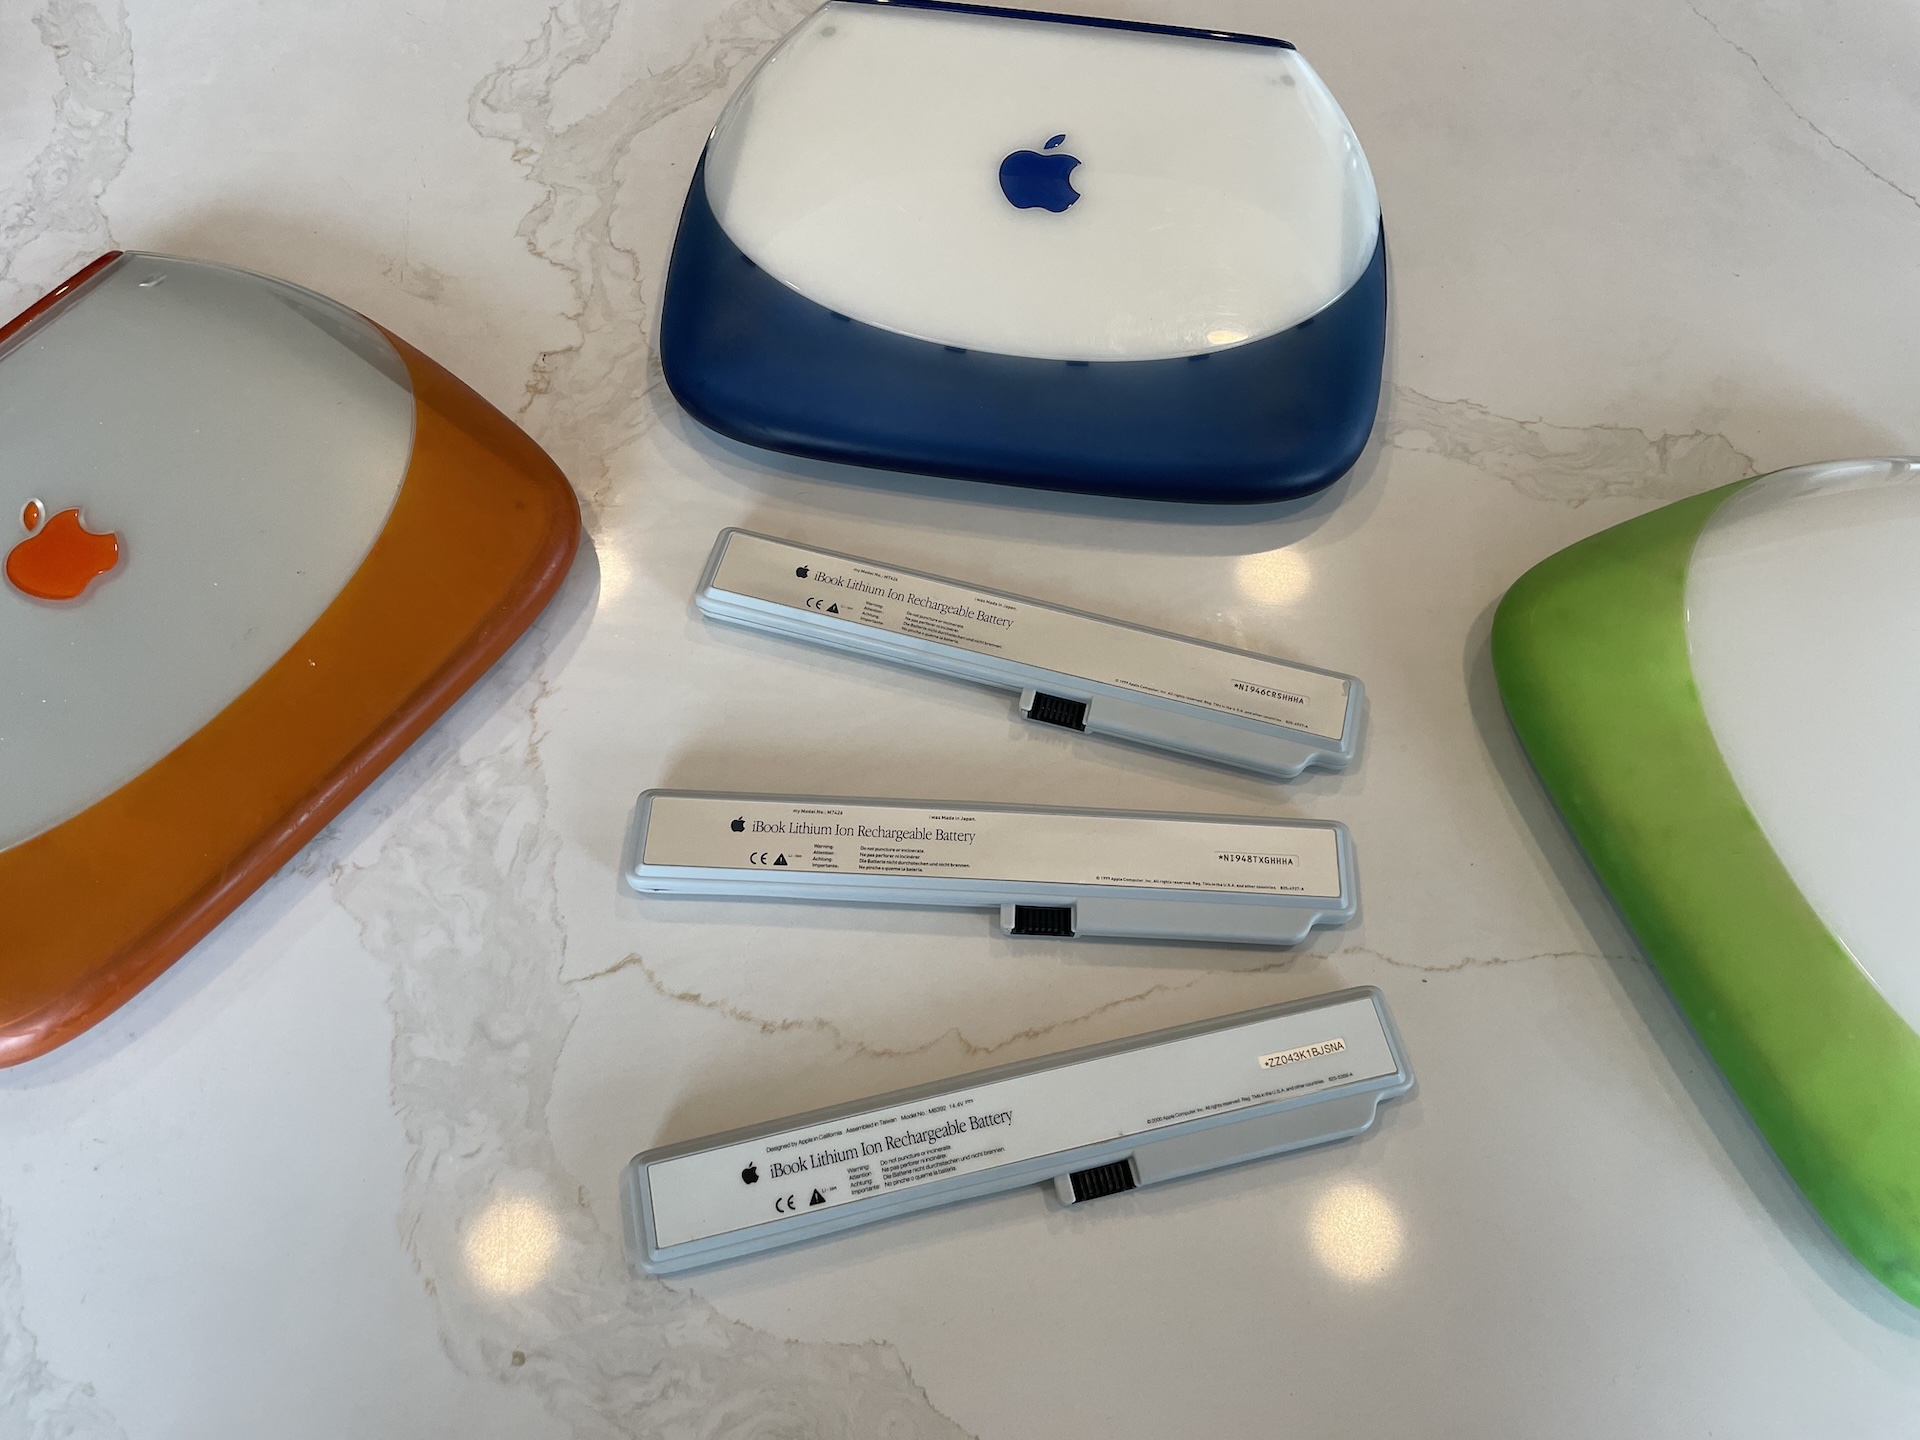
If that sounds like a bad time, then just buy a rebuilt battery from me for $250 + $50 core charge that will be refunded when you send in your Apple OEM iBook battery (BTI or other aftermarket batteries are not accepted as a core). Click the button below and I'll run to the shop and build you a freshie.
If $250 is too steep or you're one of those chaps that lives and dies by DIY, roll up those cuffs and let's continue!
Parts
First, you're going to need some flat top, unprotected 18650 cells. These cells need to be ~65.2mm in length, and 18.5mm in diameter, so check the datasheet of the cells before purchasing.
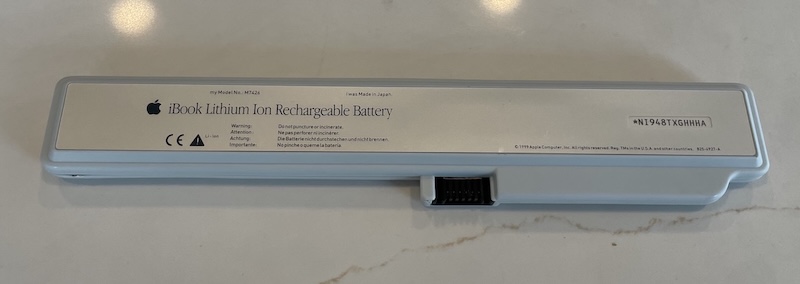
- A dead, Apple OEM iBook battery (BTI or other aftermarket batteries won't work, the cases crack when opened)
- 18650 cells such as Samsung 30Q or Samsung 32E
- Nickel strips with a minimum length of 75mm, such as these individual strips
- Solder, I prefer 63/37 rosin core solder for its lower melting temperature
- Some tape, any will do, Scotch Vinyl 700 electrical tape is cheap and leaves no residue
Tools
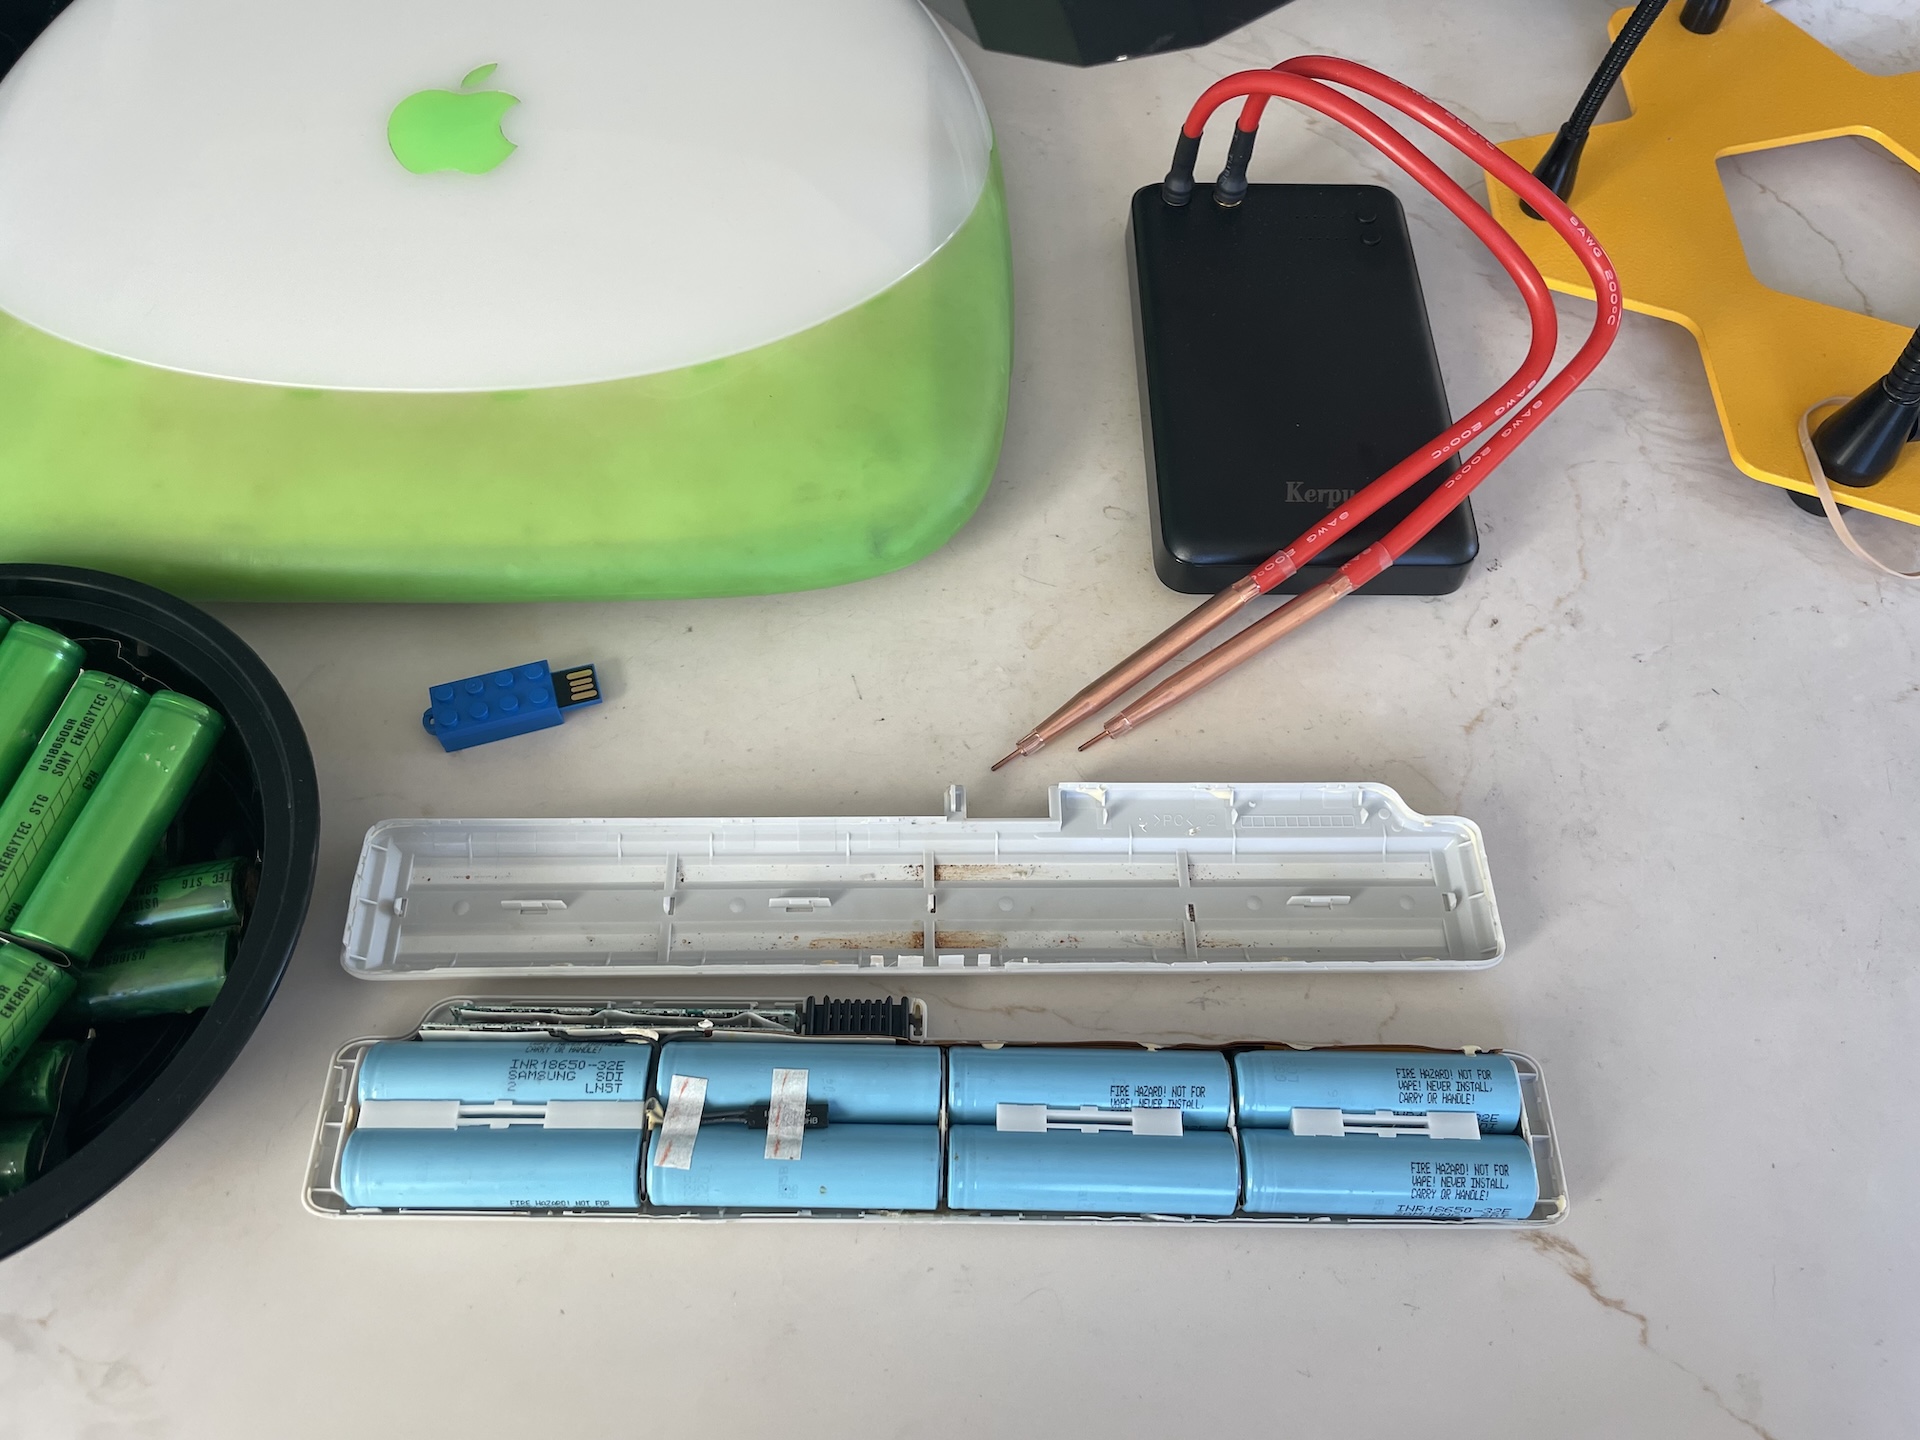
The most important tool you'll need is a spot welder. Personally, I have a cheap Kerpu model from Amazon. It's battery powered and comes with some of the nickel strips you'll need, and you can get these pre-cut nickel strips when you run out.
- Spot welder, such as the Kerpu Mini Spot Welder
- Soldering iron, such as the awesome, USB-C powered TS-101
- Tweezers, such as the Hakko CHP 00D-SA Fine-Tip Tweezers
- Medium sized flathead screwdriver, or even a couple of of them
- Multimeter, such as the Fluke 101
- An iBook, of course, to train and test your new battery
Preparation
First, put your existing dead battery into your iBook. Run the following command:
system_profiler SPPowerDataType
You should see the capacity values for your battery:
Battery Information:

  Battery Installed: Yes
  First low Level warning: No
  Full Charge Capacity (mAh): 509
  Remaining Capacity (mAh): 10
  Amperage (mA): 253
  Voltage (mV): 14558
  Cycle Count: 151
You can also open up System Profiler to get this info, or even use coconutBattery 2.6.6 from coconut-flavor to read this information.
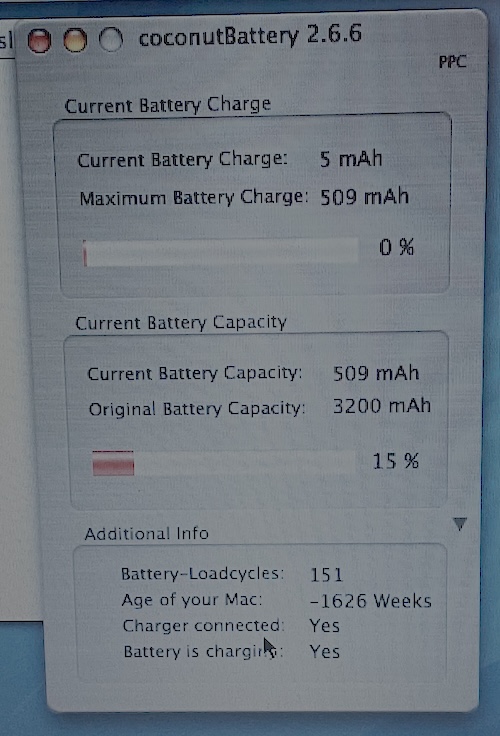
✅ If you see a Full Charge Capacity value of a reasonable positive number, your controller board is good and you're ready to rebuild.
❌ If you see negative numbers, wild numbers like 42124 cycles, or a 10000mAh full charge capacity, or an original capacity of a negative number or insanely high number like 33293mAh, your controller board is bad and you should source a different battery to rebuild
Testing your new batteries
First, get out your multimeter and ensure that each one of your new cells has the same voltage. The charge state of the cells doesn't matter, they just all have to be really close in voltage; 3.84V and 3.85V is fine, but 3.75V and 3.85V is not.
If your cells are different voltages, you can charge them with any old 18650 battery charger.
💣 If you skip this step, your battery will never charge to its full capacity (the iBook BMS doesn't balance well, if at all), and you risk creating an expensive and dangerous handwarmer if you join a fully charged cell and fully discharged cell together in parallel.
Opening the pack
💣 The most important part of this step is to avoid damaging the delicate ribbon cable that runs between the black battery connector and the cells on the thin side of the battery. Under no circumstance should you insert your screwdriver on the side with the connector!
The goal here is to break the adhesive on the top of the case free from the batteries so you can remove the top case.
- Start with the black connector of the battery facing upwards and away from you (the "iBook Lithium Ion Rechargeable Battery" text should be facing towards the sky, but read upside down).
- Insert your flathead screwdriver near where the little clear plastic tab is and twist it. Work an inch or so on either side of the tab to get it started
- Slide your flathead between the batteries and the top case and start working your way to the ends of the battery, levering the case away from the cells as you go, but again, only on the side opposite of the black connector
- Work your way around the pack, and when you get to the edges, you can switch to using your hands and finger nails to pull the case apart
- Once you have the top case off, you can insert your screwdriver under the batteries and pop them gently out of the bottom case
- Gently remove the batteries, black connector, and battery board as one piece
- Heat up your soldering iron and desolder the 5 nickel strip tabs from the ribbon cable and PCB. As you remove the cells be sure to keep them in the same orientation so you can use them as a guide when you create your new packs.
Take a deep breath and stretch, that was stressful!
Rebuilding
Before you begin, be sure to note the orientation of the batteries, it's best to take a photo you can refer to.

Cut nickel strips
Straighten out each of the 5 nickel strips on the old packs and cut new nickel strips to to length, leaving 5mm+ of extra length you can trim later. Don't cut them to be thinner yet, you'll do that after spot welding. You should end up with:
- 1x ~48mm - this connects the outermost positive side of the pack to the PCB
- 3x ~35mm - these connect the middle sides of the packs and the outermost negative side to the ribbon cable
- 2x ~75mm - these join packs of 2 together and connect to the PCB and ribbon cable
Set these aside, or better yet, line them up with their corresponding locations next to your old pack.
Assemble your first pair (leftmost)
We're going to do this from left to right with black connector facing up and away from you.
- Start by removing the small white plastic piece from between the first pair of batteries, you'll want to cut or remove the nickel strip to free the plastic piece.
- Take two new cells, face them the same direction, insert the plastic piece between them, and lash them together with some tape.
- With the positive side up, take the 2nd longest nickel strip (48mm) and place it on top of cells
- 💣 At this point, it is critical that you double check that both batteries are facing the same direction
- Center the nickel strip across the cells and use a small piece of tape across the strip and one of the batteries to hold it in place
- Turn your spot welder on, without touching the metal tips of the spot welder or the nickel strips with your fingers, and without touching the tips together, place both of the tips on the nickel strip in the center of the battery, 2-3mm apart, and hold them there until the spot welder sparks, then remove the tips
- Make 1-2 more welds on either side in a ⠶ or ⠿ pattern, making sure you're still above the button on the top of the battery
- Remove the tape and weld the nickel strip to the other battery
- Flip the pair over so the negative side is facing up, take the longest nickel strip (75mm) and place it across the the battery, with the long end facing away from the long end on the positive side. If that sounds confusing, just refer to the configuration of the old cells.
- 💣 At this point, it is critical that you double check that both batteries are facing the same direction. If they're facing opposite directions right now, you will be making an IED, not a battery.
- Again, center the nickel strip and use a small piece of tape to hold the strip to one of the batteries
- Do the spot welding thing again
- Remove the tape, do the spot welding thing again
You should now have a nice pair of cells with nickel strips that match the configuration of the leftmost pair in the original pack. Phew!
Assemble your second pair
This is a lot like the first pair, except you're going to use the shortest nickel strip on the negative side of the battery, and this pair of batteries doesn't use a plastic piece as it needs to leave room for the thermistor.
- Take two new cells, face them the same direction, and lash them together with some tape
- With the negative side up, take the shortest nickel strip (35mm) and place it on top of cells
- 💣 At this point, it is critical that you double check that both batteries are facing the same direction
- Center the nickel strip across the cells and use a small piece of tape across the strip and one of the batteries to hold it in place
- Do the spot welding thing
- Remove the tape, do the spot welding thing again
You should now have a pair of cells that are only connected on the negative side.
Assemble your first set (leftmost)
Now we're going to turn two pairs into a veritable foursome of 18650s in a 2S2P configuration.
- Take the pair of cells with no plastic piece and the shortest nickel strip and place it positive side up with the nickel strip facing off to the right.
- Take the pair of cells with the plastic piece, the longest nickel strip, and the 2nd longest nickel strip, and place it positive side down with the longest nickel strip facing to the right, hovering over the positive side of the other pair of cells
- You should have 4 batteries side-by-side, standing on end.
- The left 2 batteries should be negative side up and have a long nickel strip going off to the left.
- The right 2 batteries should be positive side up and have a short nickel strip going off to the right.
- Use a piece of tape to hold the nickel strip to the rightmost battery in the rightmost pair.
- Do the spot welding thing again
- Remove the tape, do the spot welding thing again
- Bend the longest nickel strip holding 2 pairs of cells together so they're positive to negative
If you did this right, nothing is on fire and you have a battery pack with 2 pairs of 2 cells, the leftmost pair should have a plastic piece and a long nickel strip facing away from you, and the rightmost pair should have no plastic piece, 1 medium nickel strip tab in the middle facing away from you, and one nickel strip tab on the right facing away from you.
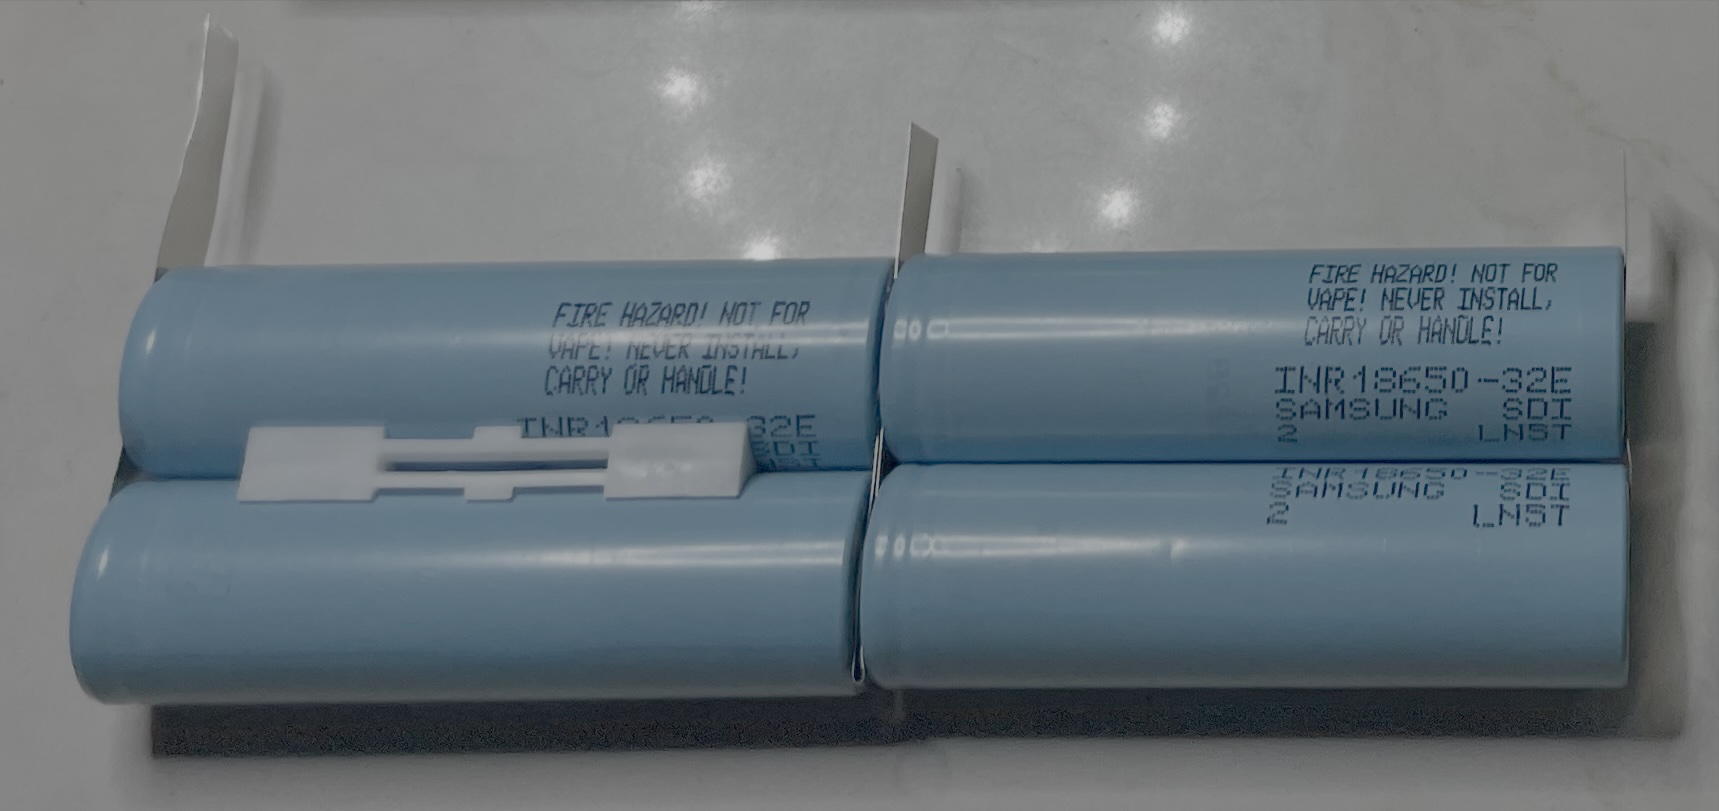
Assemble your third pair
Follow the same process as above for the first pair, except this pair will use the shortest nickel strip (35mm) to connect the positive sides of the pair.
Assemble your fourth pair (rightmost)
Follow the same process as above for the second pair, except your fourth pair will use a plastic piece as well.
Assemble your second set (rightmost)
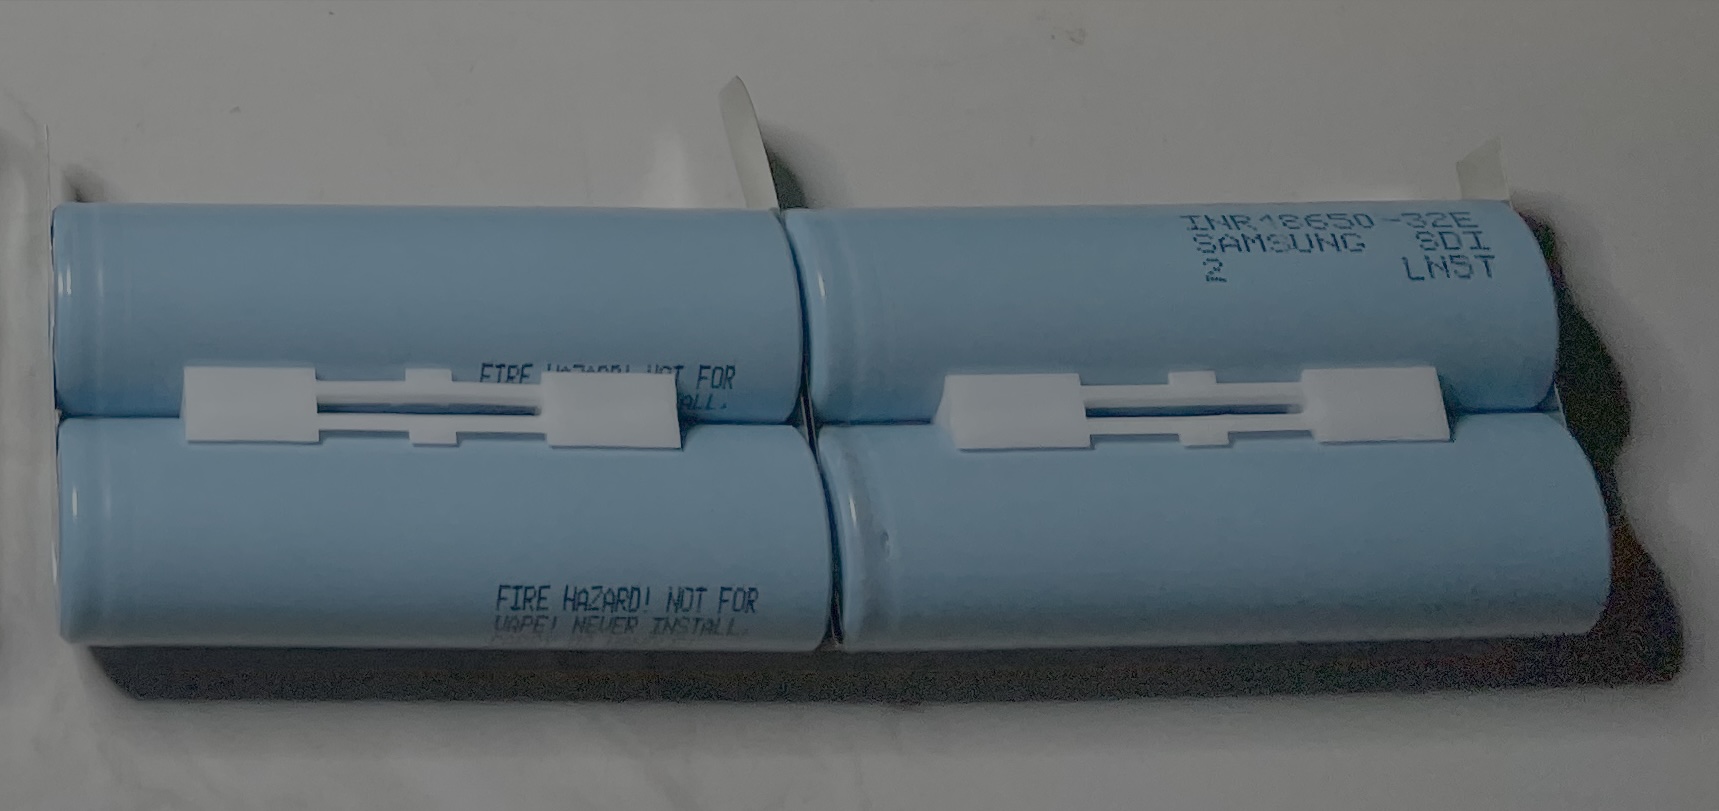
Follow the same process as above and make it look like this. If you're ever lost, compare it to your original battery pack (you kept it in the right orientation, right?).
Trim the nickel strips
Look at your original battery pack -- the nickel strips are thinner where they connect to the ribbon cable and battery board. Trim your nickel strips to match both width and length, and be sure to pay attention to orientation so the thin part you cut is on the correct side. Compare to the old pack every step of the way!
Now you're ready to solder it up!
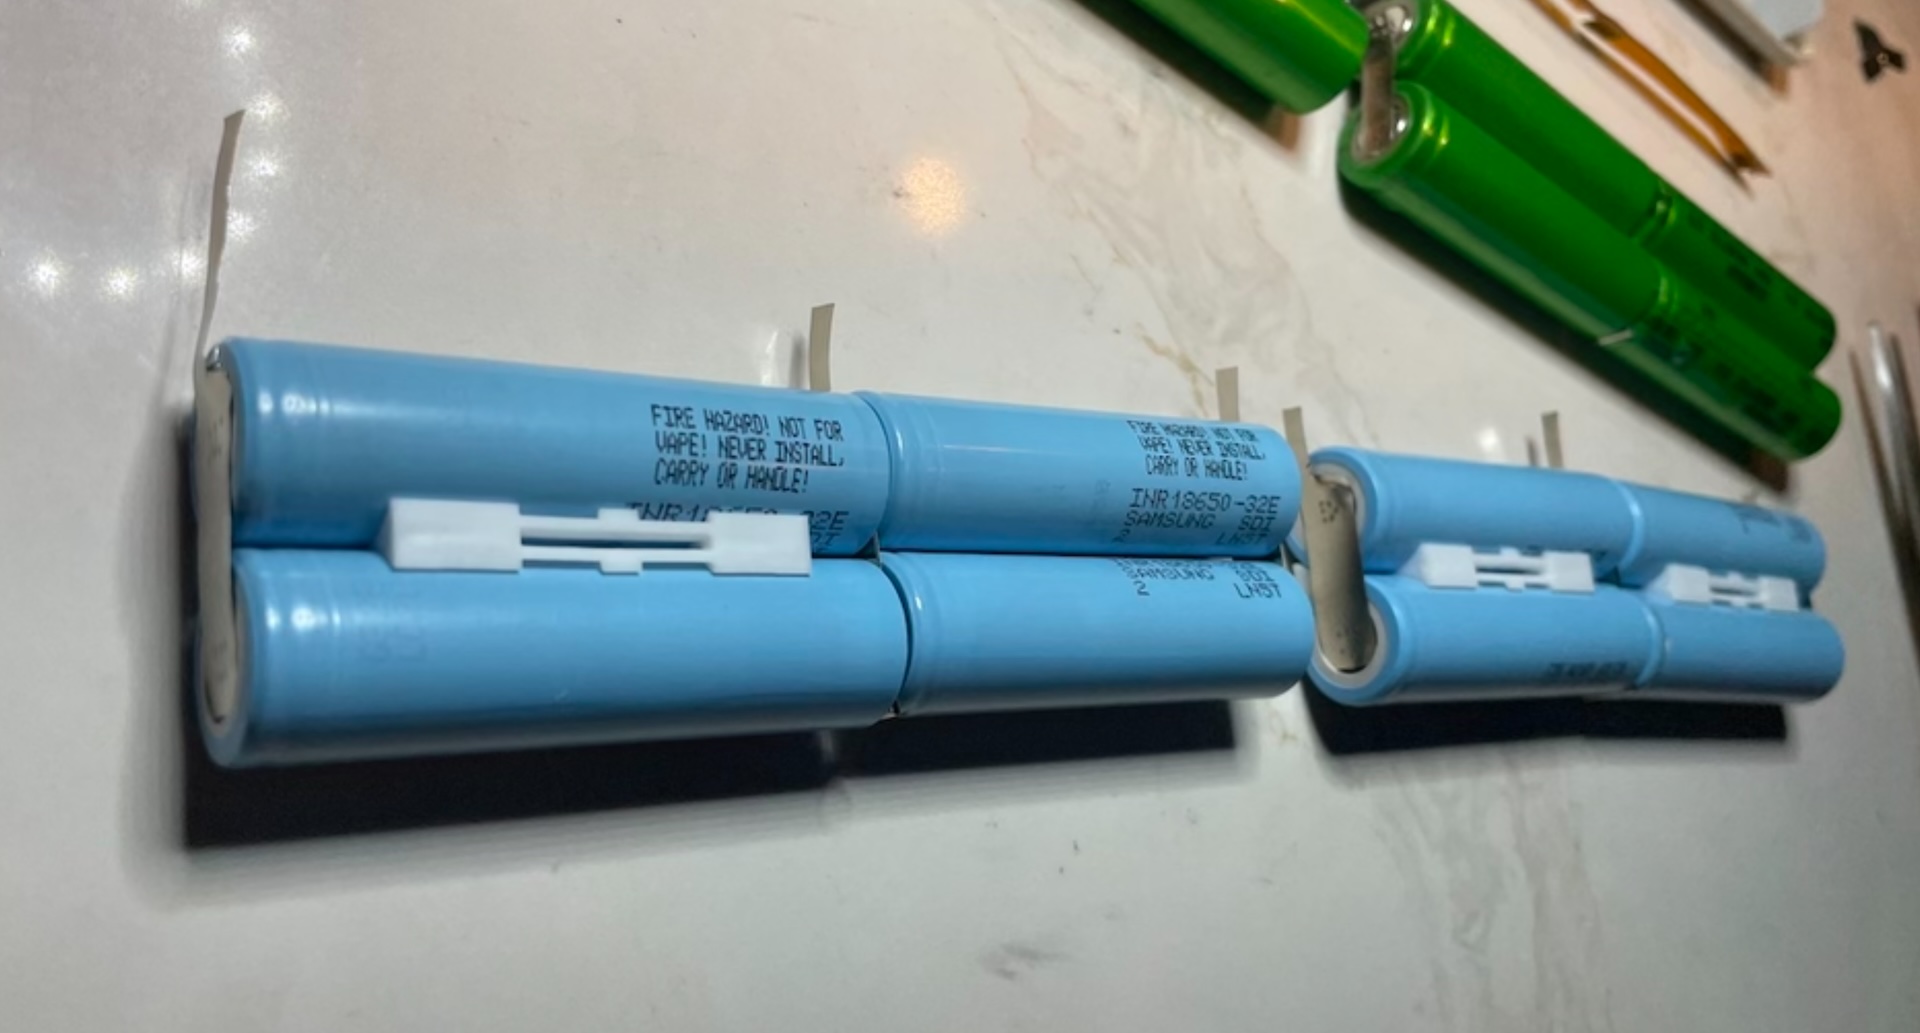
Solder both sets to the ribbon cable
Now it's time to bend the nickel strip into place and solder them to the PCB! Start by tinning both sides of each nickel strip tabs with solder, then tin the pads on the ribbon cable and PCB, then slip the ribbon cable/connector/battery board assembly into place and bend the tabs so they line up.
This is where the tweezers come in -- I like to use them to hold the tabs in in place while I apply heat. I find the tweezers don't smolder and burn like fingers, and there's no awful smell or searing pain either. Line up the tabs, heat them up real good, hold them in place, then wait a few seconds before removing your tweezers.
Ensure you've made a positive connection, then rejoice -- you're (almost) almost done!
💣 It is imperative that you take care to not touch your soldering iron to the battery while doing this. Your soldering iron will instantly melt the insulation on the battery, and if you're soldering a positive terminal, will short the battery out, causing a big, scary spark.
Pre-assembly testing
First, get out your multimeter measure the voltage between the leftmost nickel strip (connected to the battery board) and the rightmost nickel strip (connected to the ribbon cable).
You should get a voltage reading corresponding to the individual cell voltage multiplied by 4. For instance, if each of your cells measured 3.85V before you build the pack (you made sure they were all the same voltage, right?), your pack should read 15.4V.
Next, double check all solder joints are solid, there are no shorts, no dangly bits, nothing that appears sharp or dangerous.
Partial assembly
Drop the completed pack into the bottom battery case, taking care to ensure that the ribbon cable is not pinched by the edge of the case. Align each of the plastic inserts to the tabs that slot into them, then press the batteries in so they're snug. The black connector slots right in, and everything should fit nicely.
We're not going to put the top case on yet, first we need to test your pack.

Post-partial assembly testing
Insert your partially assembled pack into your iBook and fire it up. Run the following command:
system_profiler SPPowerDataType
The Full Charge Capacity will not have changed, but you should see the same voltage you measure during Pre-assembly testing listed after Voltage.
If your battery is recognized and the voltage is correct, it's time to button things up.
Final assembly
Now that we've confirmed your pack works, it's time to install the top case. Line up the grooves in bottom case with the insert on the edges of the top case and work it into place. Squeeze the case and the edges of the case so it slots into place. The adhesive present on the cases will hold the pack together, there's no need to glue anything.
💣 Be careful while you're doing this -- if something is going to short out and explode, it's probably going to happen now. Be ready to throw your battery our the window.
Smoosh the edges of the battery one more time to get it as svelte as possible, then insert your freshly rebuilt battery into your iBook. Be careful when putting on the bottom battery cover -- make sure the battery is as far to the edge of the iBook as possible and be gentle when putting the cover on. Rebuilt batteries can be a little thicker than the originals, and if you're not careful, you'll crack a tab off your battery cover.
Fire it up, and take a deep breath! You're only 15 hours away from being done!
Retraining
I discovered that retraining the battery involves simply following this little stanza from the Gas gauge operation section of the bq2040 datasheet:
FullChargeCapacity or learned-battery capacity
FCC is the last measured discharge capacity of the battery. On initialization (application of VCC or reset), FCC is set to the value stored in the EEPROM. During subsequent discharges, FCC is updated with the latest measured capacity in the Discharge Count Register, representing a discharge from full to below EDV1. A qualified discharge is necessary for a capacity transfer from the DCR to the FCC register. Once updated, the bq2945 writes the new FCC to the EEPROM. The FCC also serves as the 100% reference threshold used by the relative state-of-charge calculation and display.
So you just drop in, slap the EEPROM value into the FCC wha-pop, drop down to EDV1 wha-paaa, and then after that, you just drop the DCR into the FCC, ride the barrel, put the FCC into EEPROM, then get pitted, so pitted.
Put simply, charge the battery all the way, then drain the battery all the way.
Initial charge
Let your iBook charge the battery all the way. By all the way, I don't mean 100%, I mean to about 16.8V (4.2V multiplied by 4). You'll want to leave it plugged in for several hours, and you'll want to be in the same room and relatively lucid during this time in case something happens during charging and you need to throw your flaming iBook out the window.
Run the following command to monitor battery voltage:
while [ True ]
do
  system_profiler SPPowerDataType | grep Voltage
  sleep 10
done
Once you see it level out at around 16.8V (or 16,800mV), you're ready for the next step.
Initial drain
If you simply unplug the power adapter and let your iBook drain the battery, it will never hit EDV1 (12.0V) -- it will sleep long before that. This means the FCC value will never be written to the EEPROM, and your iBook will sleep long before your battery is drained.
You have two options:
- Boot into OpenFirmware (hold Command + Option + O + F after pressing the power button) or the Boot Picker (hold Option after pressing the power button)
- Boot into the Mac OS X installer (you can do this from a thumb drive too)
Once you've booted, unplug the power cord and wait about 9 hours. Once the battery voltage hits 12.0V, the machine will power off.
I prefer to boot the Mac OS X installer and run the loop command from above to monitor battery voltage while it dies. You may wish to unmount your hard disk after booting into the installer so it's unmounted cleanly, because, at the end of this process, the machine powers off.
The moment you've been waiting for
After about 9 hours, and once your iBook has powered itself off, we're ready for the moment of truth.
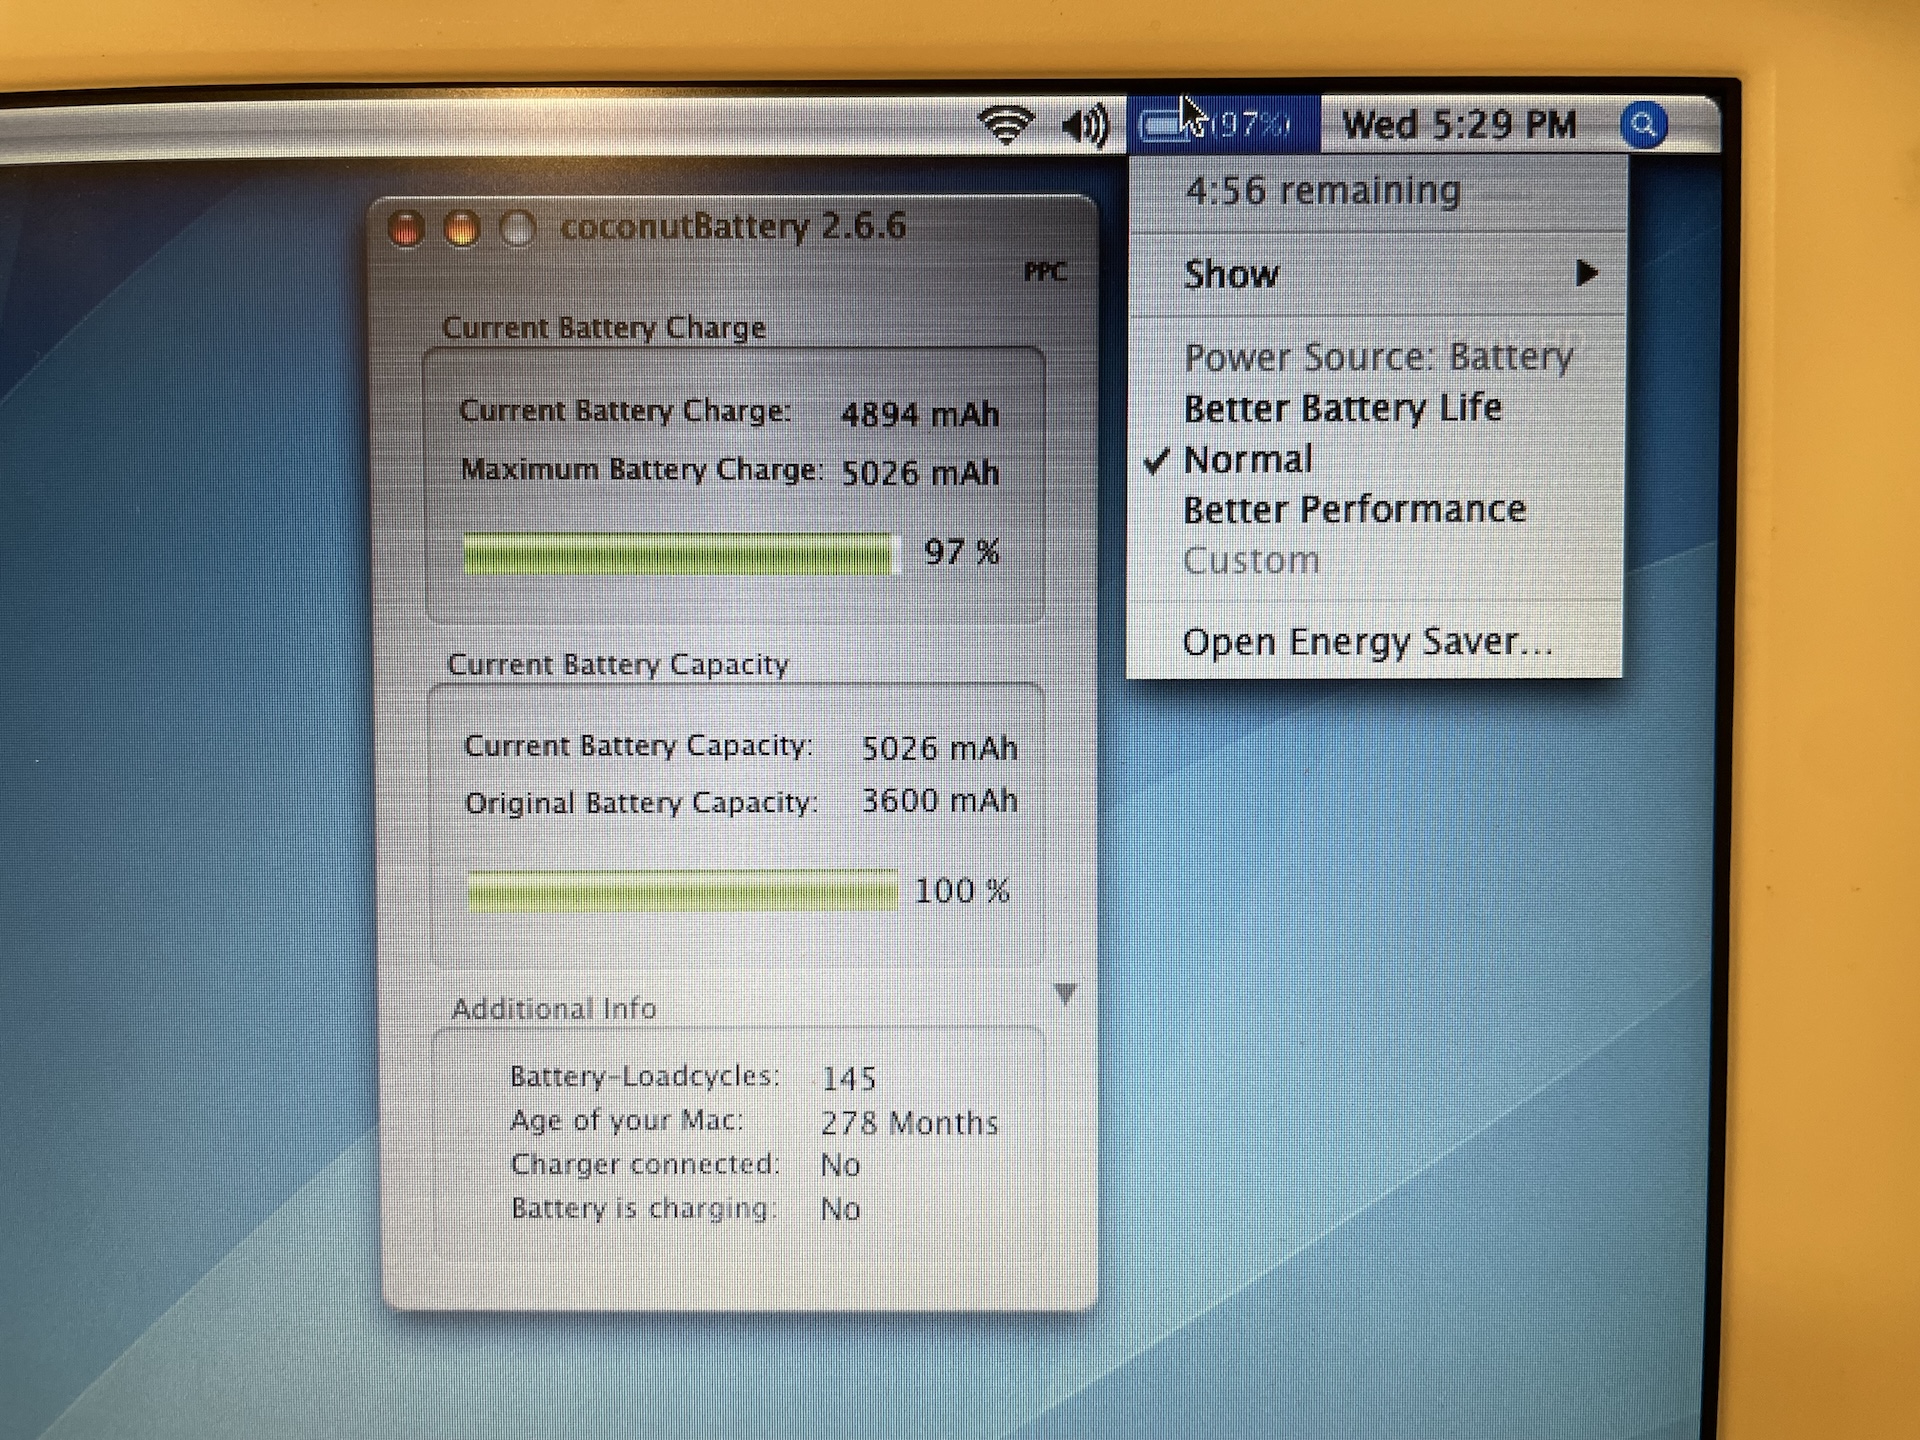
Plug your power adapter in, boot your iBook, open the Terminal, take a few deep breaths, and run the following command (or pop open coconutBattery):
system_profiler SPPowerDataType
You should see something like this -- a new value for Full Charge Capacity (somewhere around 5,000mAh), and one more cycle added to the Cycle Count:
Battery Information:

  Battery Installed: Yes
  First low level warning: No
  Full Charge Capacity (mAh): 5138
  Remaining Capacity (mAh): 36
  Amperage (mA): 1405
  Voltage (mV): 12787
  Cycle Count: 152
If Full Charge Capacity didn't update, don't panic -- just wait a second and run the command again. It can take a minute for it to update sometimes!
Conclusion
You're finally done! You can now let your iBook battery charge up and should get 5+ hours of runtime!
Be sure to discharge your battery to about 60% and remove it battery from your iBook if you plan on storing it for a long time. iBooks don't have PRAM battery, so it will slowly sip your batteries precious bodily fluids until it's beyond empty if you leave it installed during long term storage, which we all know isn't healthy.
Again, I sell these
If all of this sounds like too much, just buy one of the battery packs I have for sale!
Credits
None of this would be possible without the following resources: